
Walkthrough Chapter 4
Head to Carabia Jewelry and buy the exclusive accessory for every character. After that head to Daiba Studio. Talk to Yashiro to receive the Cast’s Script then talk to Eleonora and Tsubasa. Go to the Uzume Lesson Studio to meet Eleonora and unlock her Lesson Mode costume. Return to Daiba Studio to see some scenes and unlock Illusory Studio.
Illusory Daiba Studio
Walkthrough Illusory Daiba Studio
Enemies Main Hallway

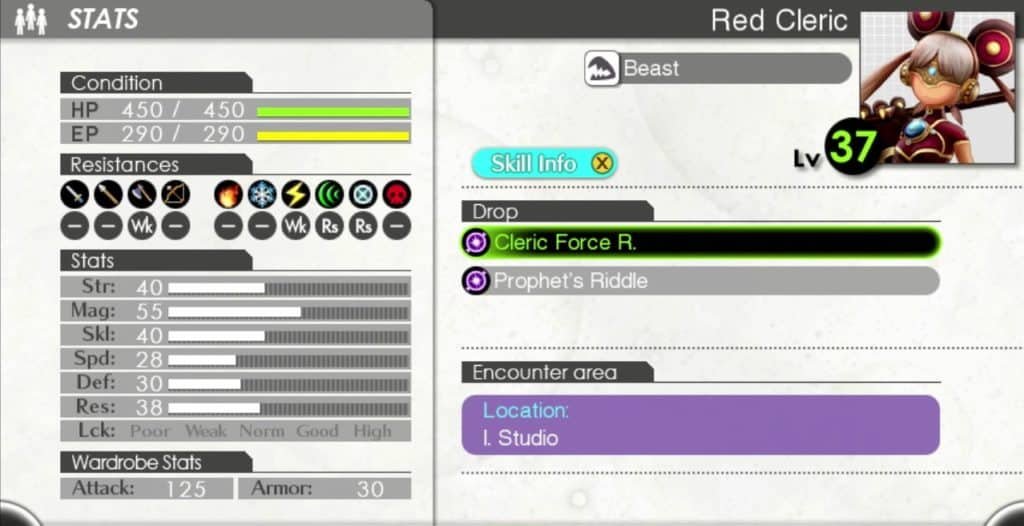
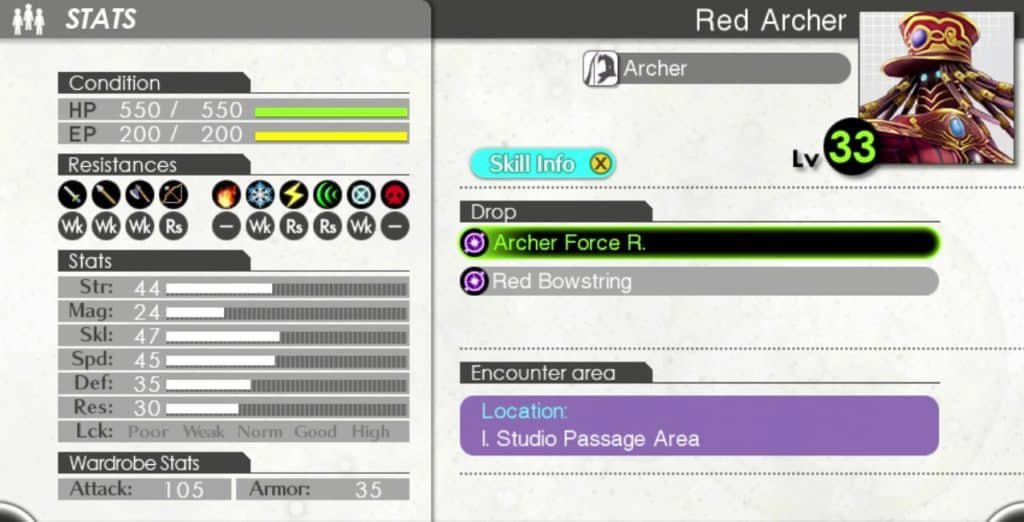

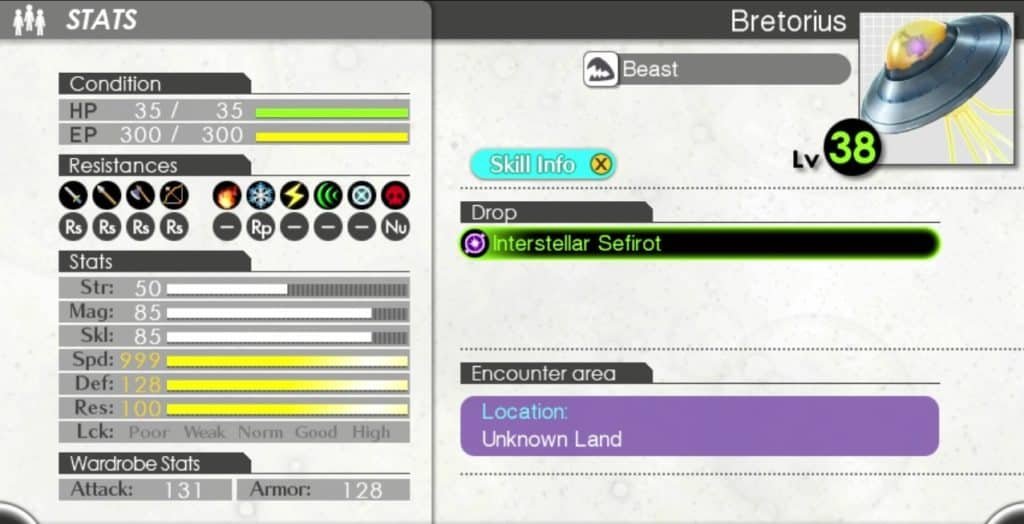
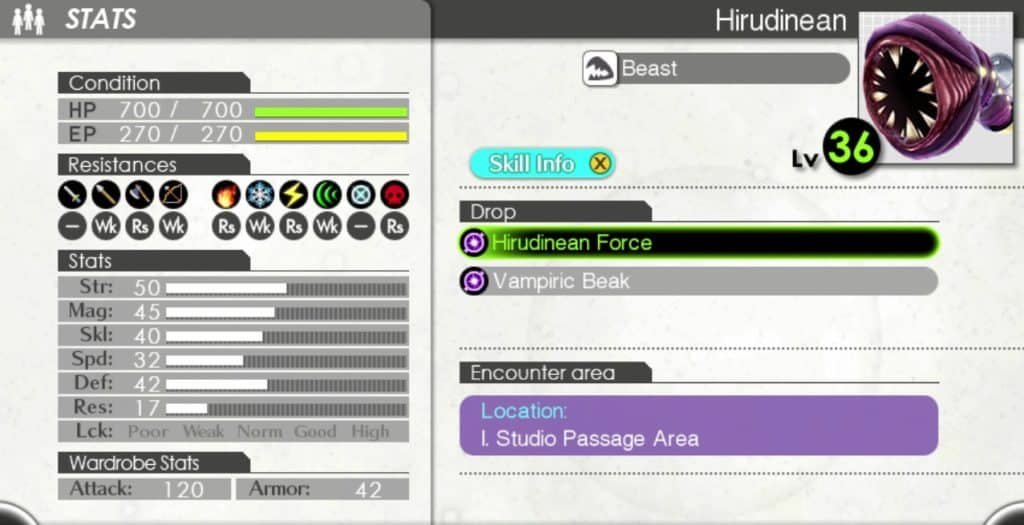
Kill some enemies and return to the Bloom Palace. You will now have the option to reforge Carnages making them stronger and unlocking another skill. When you reforge a Carnage it will get “+1” after its name. You can reforge it as many times as you want, but it wont improve anymore after “+9”. From now on you should be picky with skill learning and only learn the Best Skills for every character.

Illusory Daiba Studio consists of 10 rooms. When you enter Illusory Daiba Studio you see 10 TV screens at (A) that represent these 10 rooms and show you where they lead. For now only 2 rooms should lead somewhere, all other rooms will teleport you back to the start and reshuffle the rooms. Open the locked chest (1) with Detritus x5 and chest (2) Amrita Soda x2 and chest (3) with Ellie’s Studio Wiring Performa.
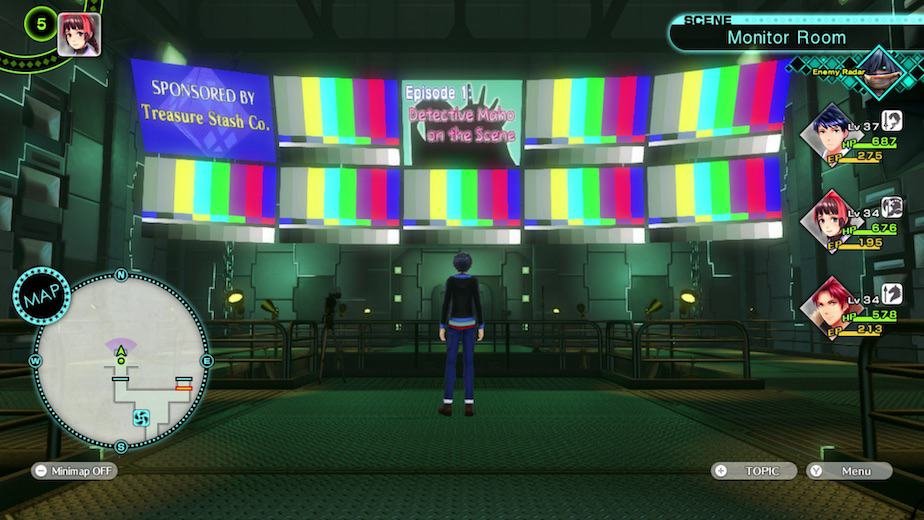
The Sponsored By Treasure Stash Co. room might be in the top right which will lead you to (4) 40,000, (5) Chakra Pot, (6) Bead x2, (7) Soma and a (8) Treasure Key. If it is on the top left side you can access (9) Bead Chain, (10) Treasure Key and (11) Balm of Life.
To progress the story take the room with Episode 1: Detective Maho on the Scene. Tokyo Mirage Sessions #FE Encore will let you choose between Kiria or Touma, but in the end you will be stuck with Touma. Change your party to Itsuki, Tsubasa and Touma, equip them with the best weapons you have and challenge the 3 Biomonsters, which might be the hardest battle yet.
3 Biomonsters Fight
The biomonsters are weak against fire and lightning attacks. The challenge in this fight is to kill them all in the same round. If a biomonster is alive at the end of a round it will revive the others with full health. Try to lower the health of all Biomonsters as low as you can and use a Special Performance to finish them of in the same round. Don’t forget you can use items too.
Enemies LCD Panel Room
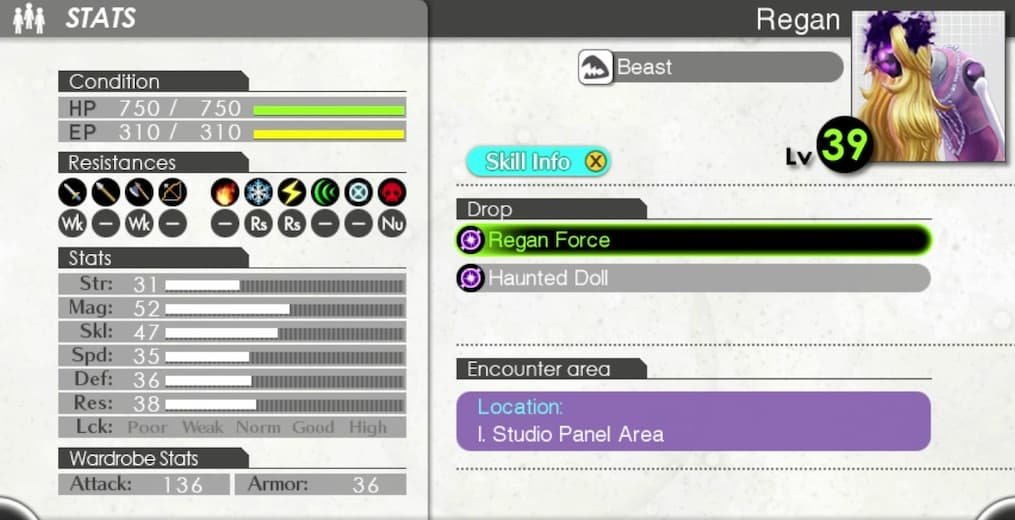

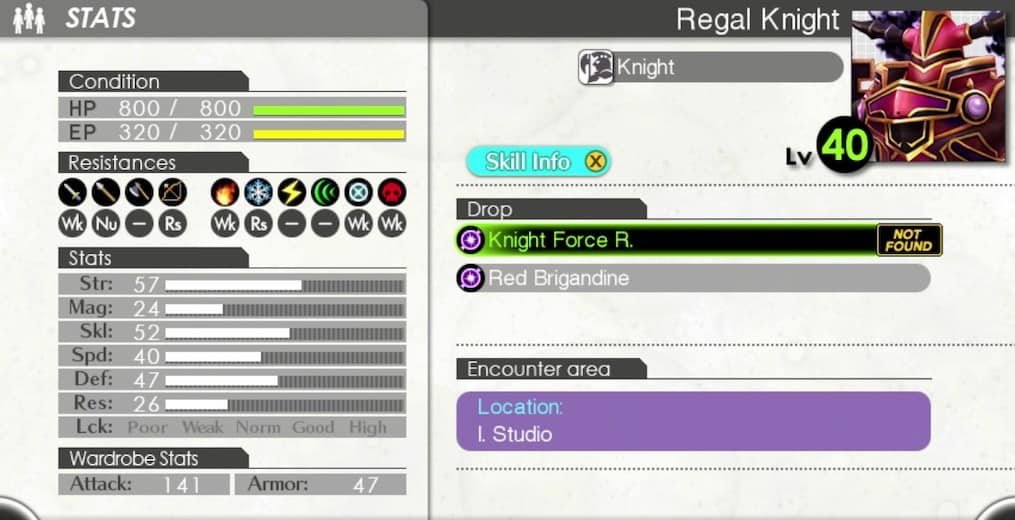
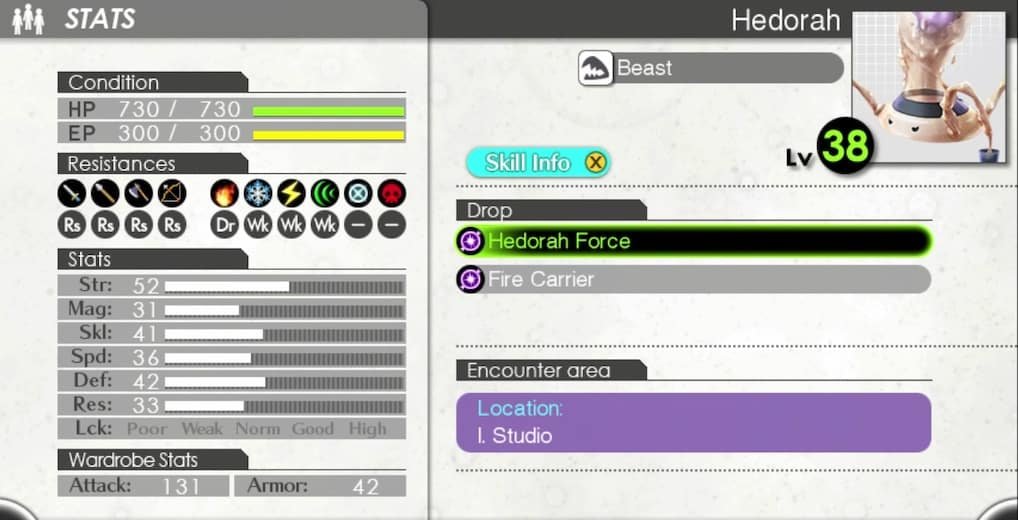
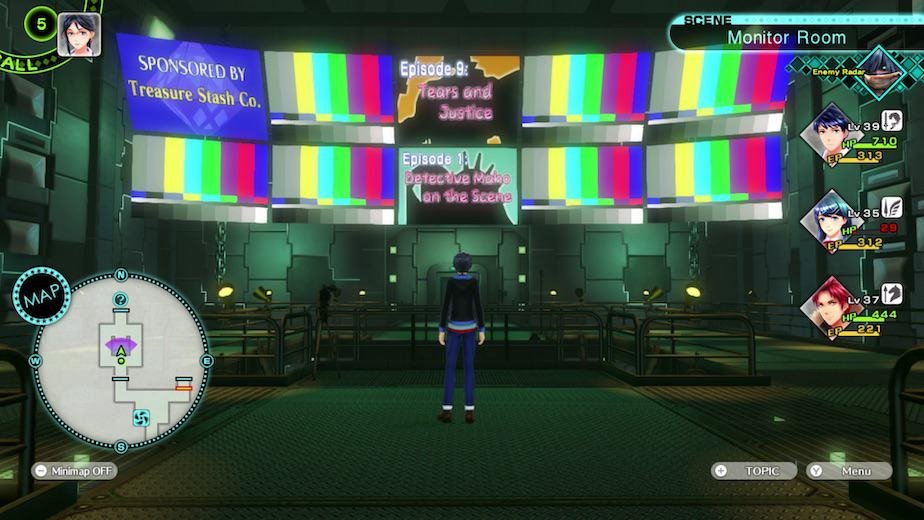
After the fight you return to (A) and see a new room Episode 9: Tears and Justice shown on the 10 TV screens. So head there and prepare yourself for the most annoying room not only in Chapter 4 but in the whole game.


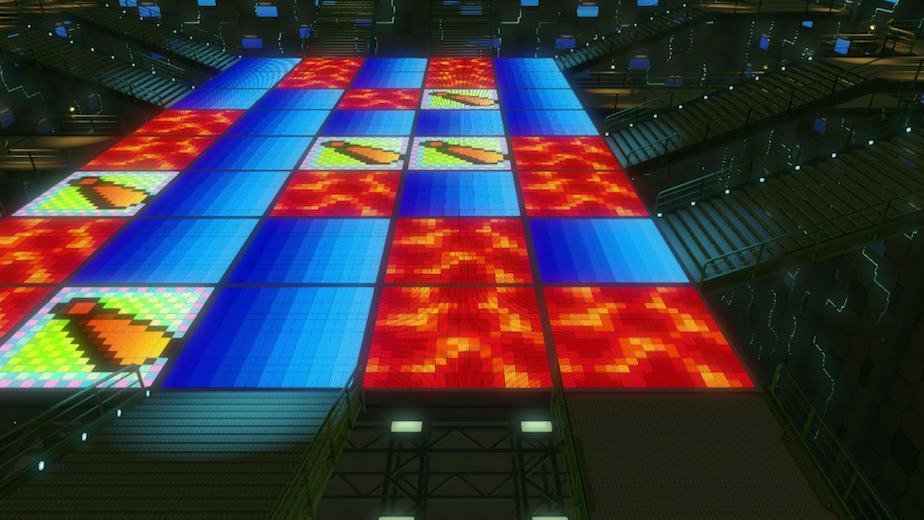
You will see a field of panels which can be red, which means you can’t pass, blue you can pass and with an exclamation mark which will trigger a trap like a fight, lower your HP or give you negative status ailments. Take the stairs to the panel field and go up the stairs to your right and open chest (1) Studio Fuse Box Performa for Tsubasa and locked chest (2) Candle of Grudges Accessory. Return to the field and take the stairs on the middle lane to the right. You will be able to change the 4th lane. Press it twice to gain access to chest (3) Clap Track x2 and the door to the next scene.
Go back to Fortuna HQ and check Ayaha’s desk near the vending machine to unlock Tsubasa’s Heartfeld Words Performa. Unlock the Feel My Heart Radiant Unity in the Bloom Palace and go back to the LCD Panel Room in Illusory Daiba Studio.
Culprit Mirage and Hostage Mirage Fight
The Hostage Mirage A is weak against sword, axe, fire and poison attacks and will repel any magic and nullify lance attacks. The Culprit Mirage is weak against lance, ice, lightning and poison attacks and nullifies fire attacks. If the Hostage Mirage is dead the Culprit Mirage will summon another one after some rounds with random weaknesses. Use Lullaby Song and boost your defense.

After the Battle return to the Screen room and it will show you the room to the Season Finale: Farewell, Detective Maho. Go into the room and you will find yourself in the panel room in a new location. Open chest (4) Mazio Stone x2 and clear the shiny wall on the right. Use the switches until the panels are like this:

Go to the other side of the room and destroy the shiny wall to activate a shortcut and access to a Mirage request.
Activate the lower switch on the left side once to gain access to chest (5) Master Seal. Now go to the switch near door 1 and press it once so you can access chest (6) Mag Incense. Press the same switch near door 1 again and get the chest (7) Balm of Life.
Boss Fight Excellus
Activate the Teleport near Door 2 and use it to get to the Hee-Ho Mart and buy some Magic Mirrors. Excellus will attack with fire, ice and wind so equip weapons with resistances to these elements. Enter Door 2 to see some scenes and fight Excellus and Yarhiro. Excellus starts (Red) with an axe and ice weakness. It will switch to (Green) with a lightning weakness. After that it will switch to (Blue) with a sword, lance and fire weakness. After he loses most of its HP it will change to (Brown) which is weak against everything. It will attack with AoE spells so keep your health, defense and evade up and use the magic mirrors.
After the fight you will receive the Mysterious Shard and Yashiro will join you and you will have completed Chapter 4 – The Audition.
